
- cross-posted to:
- technology
- cross-posted to:
- technology
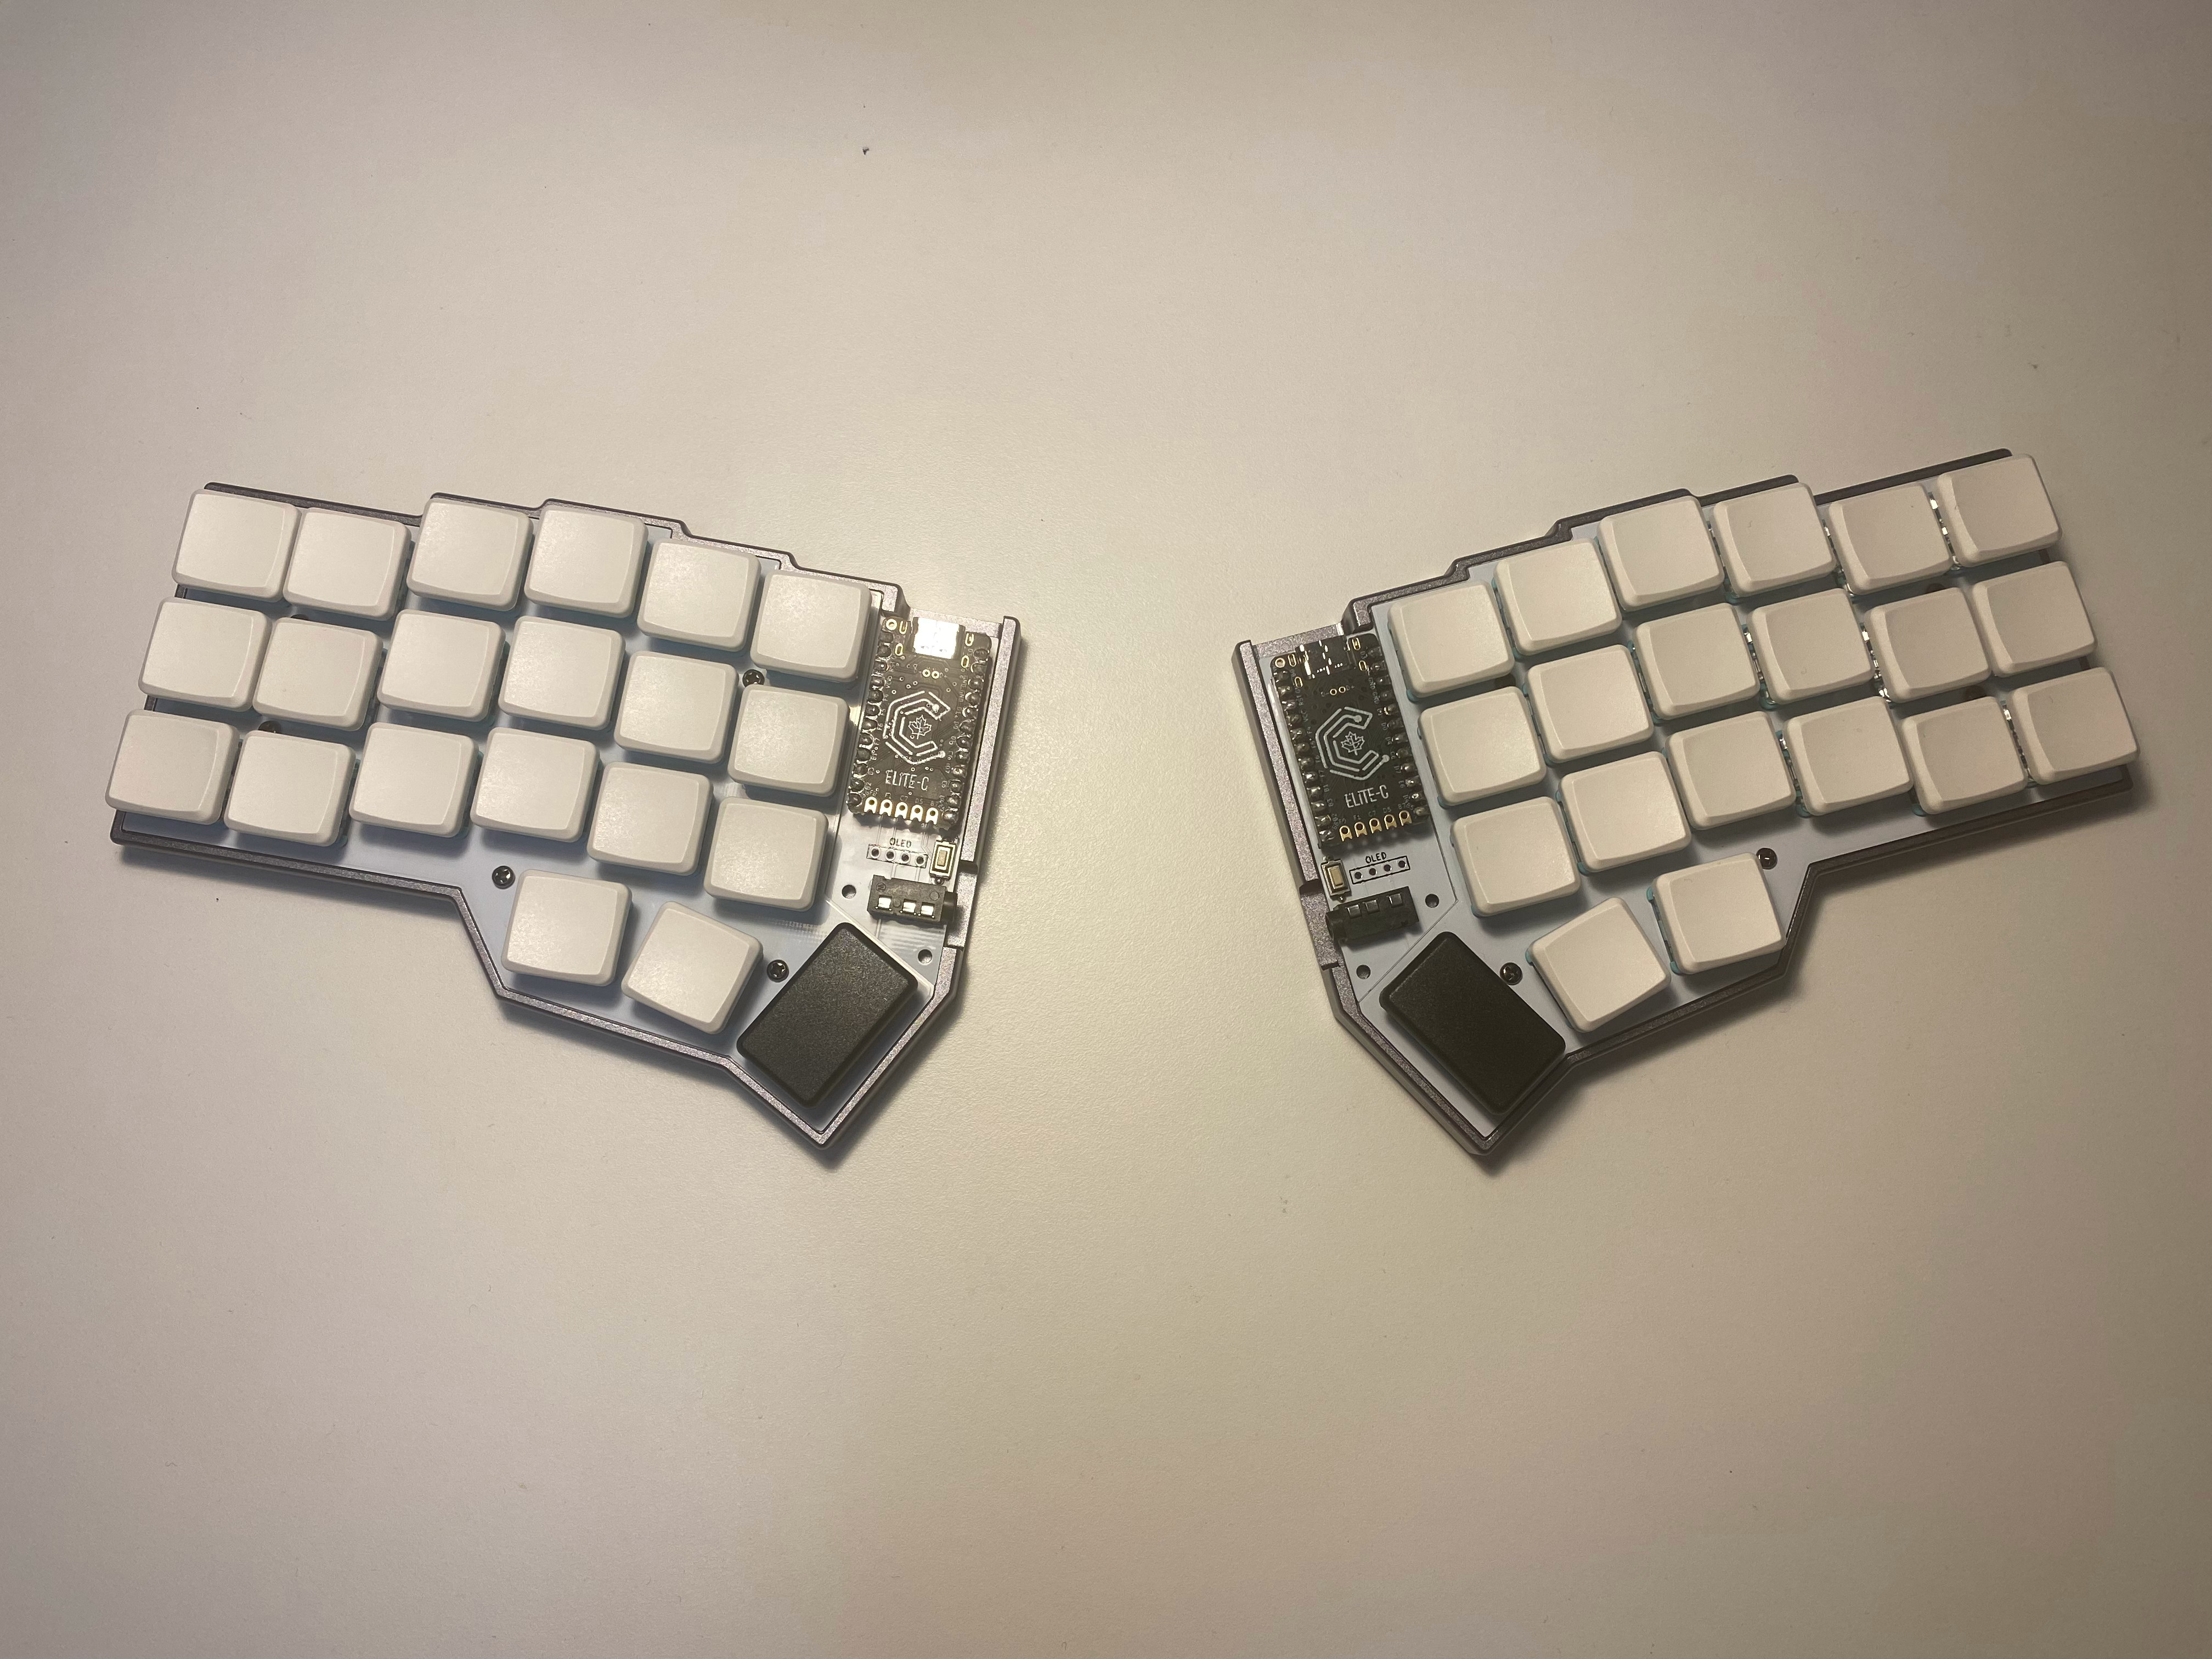
after five days, it’s finally ready: split, ortholinear layout, robin choc switches and cool special low profile keycaps 😎
story as a spoiler, bc it’s rather long, only if you have nothing to do lol
<details>
i’ve been eyeing this keyboard for a couple of years, pcbs were semi-available, but the cases, especially the cool metal ones were pretty much never available, always out of stock, or in a group buy that i always missed
so when I finally got a chance to buy one, i did so immediately
sadly the seller was in the us, so of course the shipping to europe was like 60 dollars, plus import tax, and this isn’t to me, this is to a friend in europe (bc of course they don’t ship to russia), who later brought it to me during a visit
once unpacked and ready to solder (the keyboard wasn’t assembled, you have to do it yourself), i suddenly realized that the main controller arrived with a set of pins to be permanently soldered to the pcb, which is suboptimal, as desoldering the controllers is virtually impossible, and a broken controller, a broken pcb, or anything else wrong would mean i’d have to get an entirely new pcb half
anyway, the recommended approach is to use sockets, which turned out to be pretty hard to get
i spent the first day going to major semi-electronics specialized stores, asking them whether they have something close to what i needed, they sold me components which seemed right, but once home and having checked them, turned out to be incorrect
on day two i went to the largest electronics specializing store in the city, to all three of their locations, one of them was closed early bc of holiday season, second sold me something which worked, but not very well, and last one told me they didn’t have anything
ok, last resort, i went to the “radio parts market”, which is absolutely enormous, like 15 storeys high, huge floors, literally thousands of small shops, and you can very easily get lost and wander for a long time, literally like a labyrinth, all located on the outskirts of the city
anyway, after traveling there, i spent maybe a couple of hours walking among the knee high piles of soviet-era electronic components, asking around whether they have what I needed, until some kind shop owner sold me the correct sockets, only for me to learn that the pins that were supposed to be inserted into these sockets were of non-standard size and shape (circular and smaller than regular square shaped ones), which are apparently rarer than gold
everybody i asked for them sent me to some mysterious tiny shop, located on the underground floor, for which you need to navigate quite a lot to get to, anyway, once arrived, i catched the owner literally half-closing the propective anti-theft garage-door-esque thingy to protect showcases usually, asked him whether they had such pins, only to learn they didn’t
i was in a dead end, it was like 8pm, pretty dark, -20 outside as i exit the market, unsure what to do, so i just got to the nearest cafe and pondered what i should do
nothing came up, so i just went home, dug up some diodes, cut some wire off of them, and DIYed the pins that fit the sockets out of them
a little bit of soldering later, i learned that apparently i soldered the microcontrollers incorrectly, upside down that is, probably because the atmega chip powering them and other boards such as arduino nano, is supposed to be facing up in arduino nano (which i’ve soldered many times before), therefore i just intuitively soldered the pins to the controller, so that the atmega chip faces up, which is incorrect
i desoldered the pins, soldered new ones again, only then to realzie that if I heated the solder and pushed the legs through the holes in the microcontroller, the legs would get covered in solder, thus potentially compromising the contact with the sockets, so I had to desolder the legs once again, solder these legs again, now to the other side, and spent quite some time reheating the solder and making small maneuvers to the legs in order to allign them correctly, so that they’re insertable into the sockets
there were a lot of other minor troubles, like accidentally starting to insert the switches into the pcb without putting the plate in-between them, thus having to later de-insert all the switches, but all in all, it came out successfully, even the controllers survived all that resoldering
</details>
You must log in or register to comment.
deleted by creator
thank you :)
deleted by creator
🤗
these are low profile choc robin switches
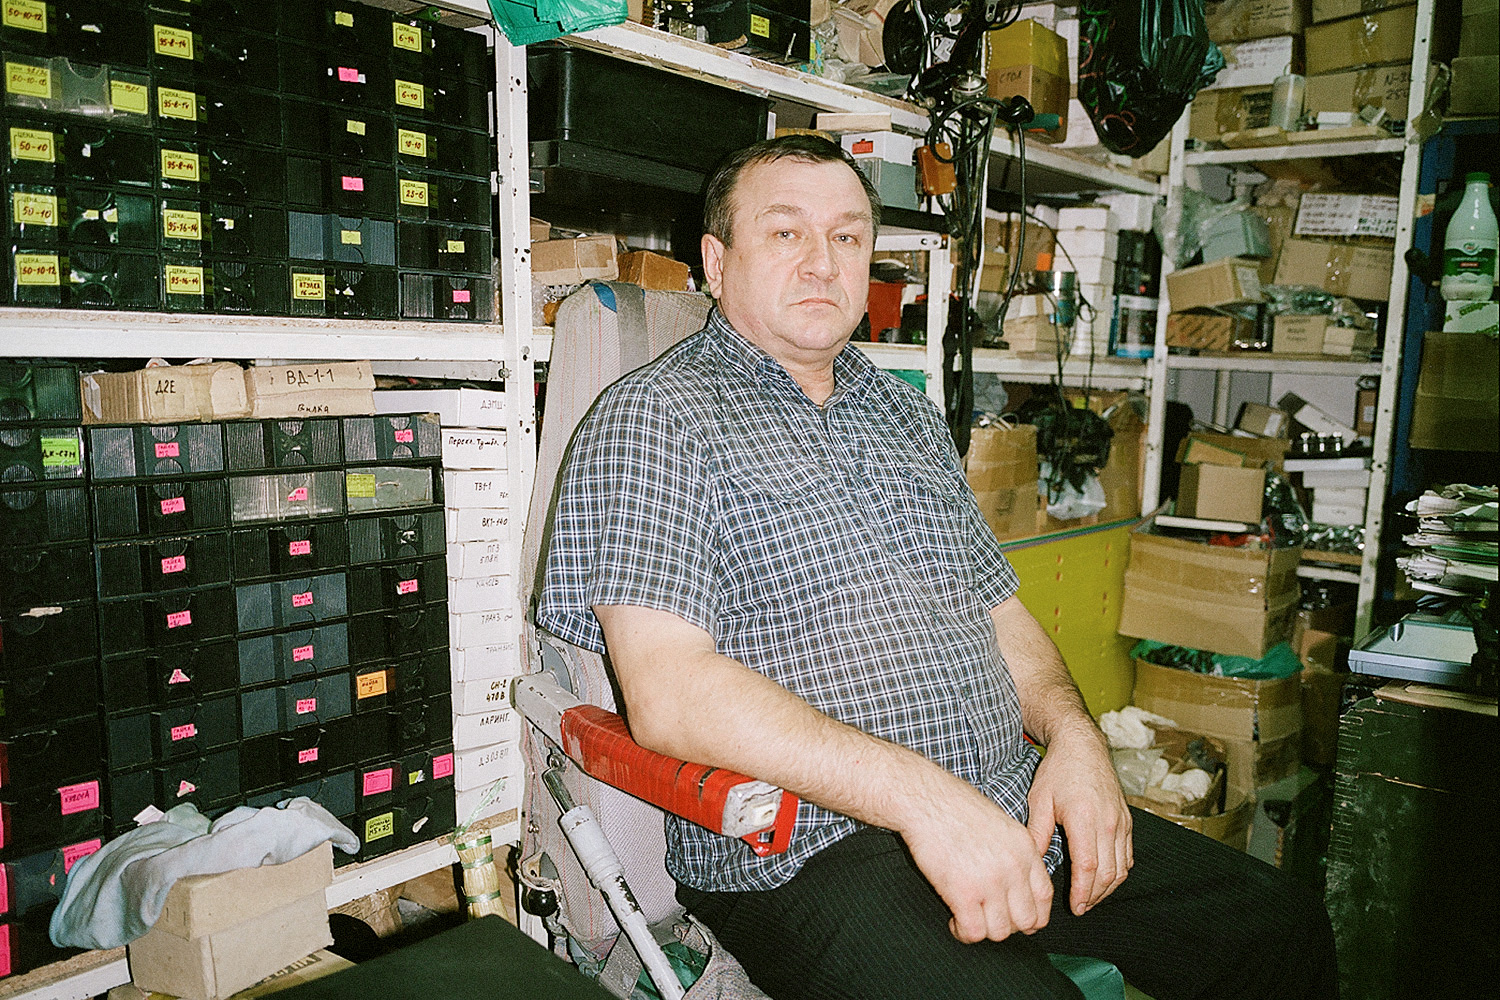
What an adventure. It would be interesting to see some pictures of the “knee high piles of soviet-era electronic components”.
And how is typing with the new keyboard? Was it worth all the effort?
i didn’t snap any while there, but here are some pics of the place i found online that show you the vibe of the place
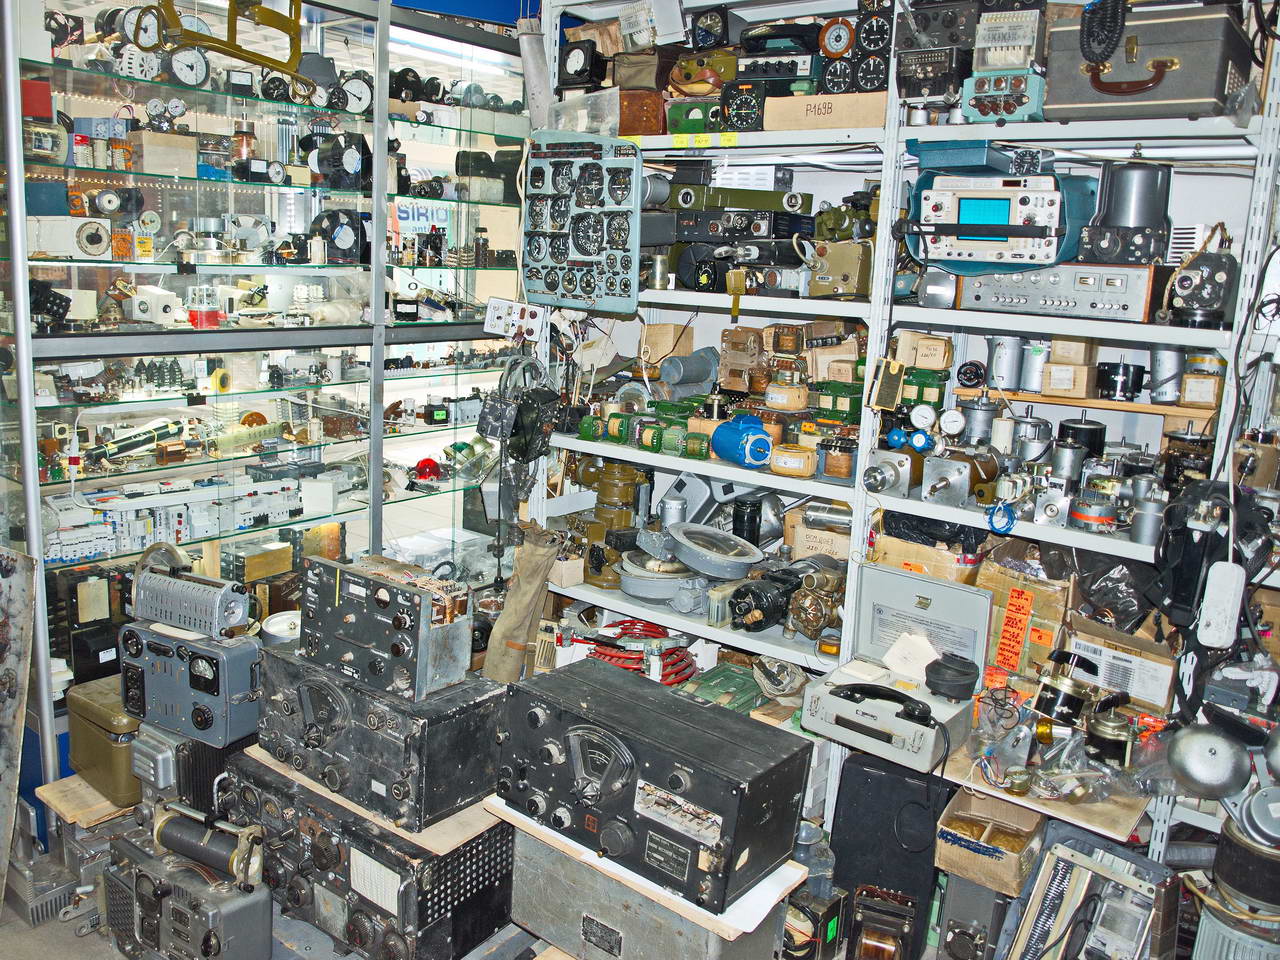
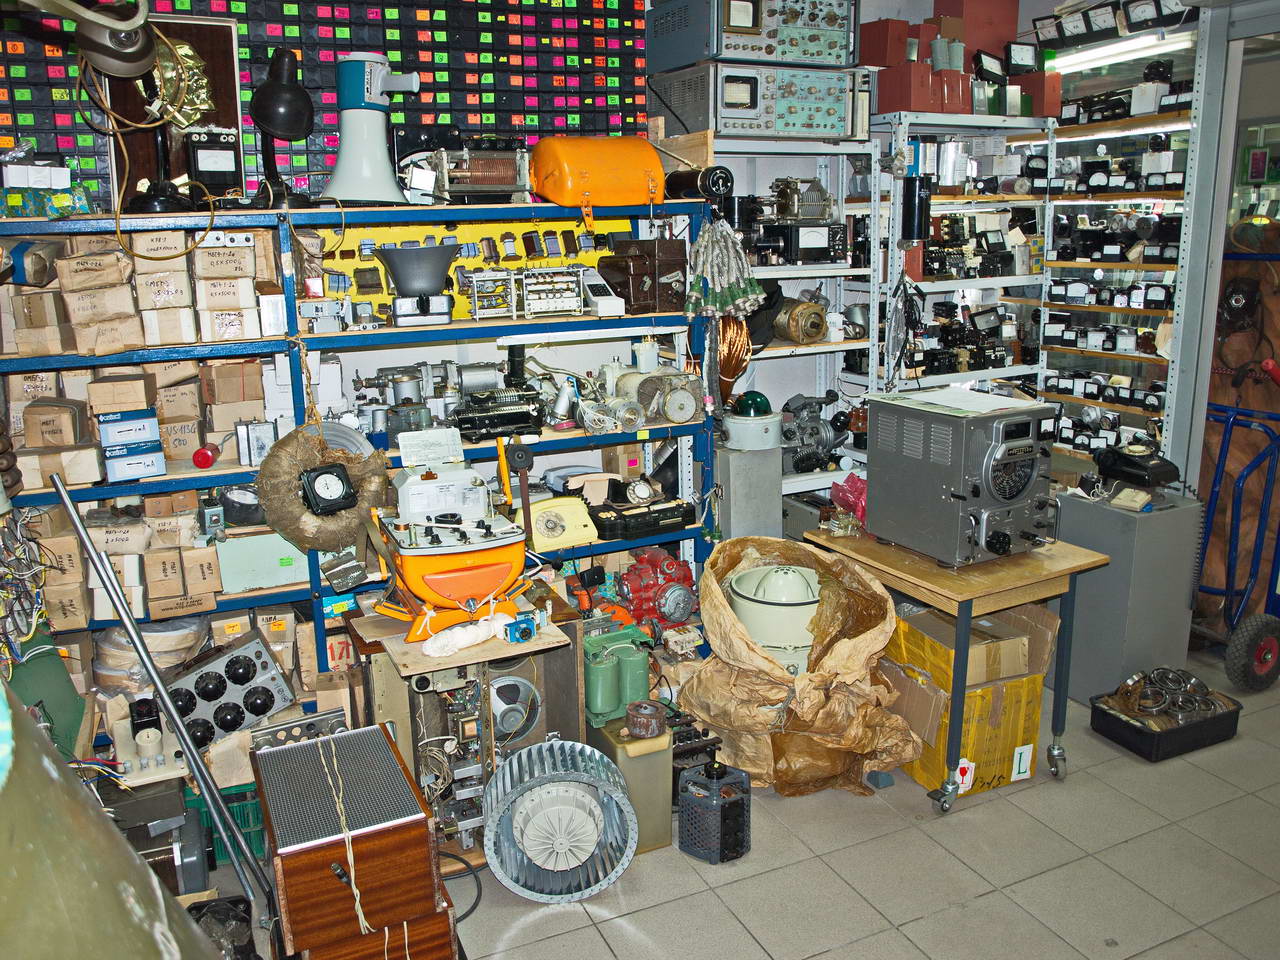
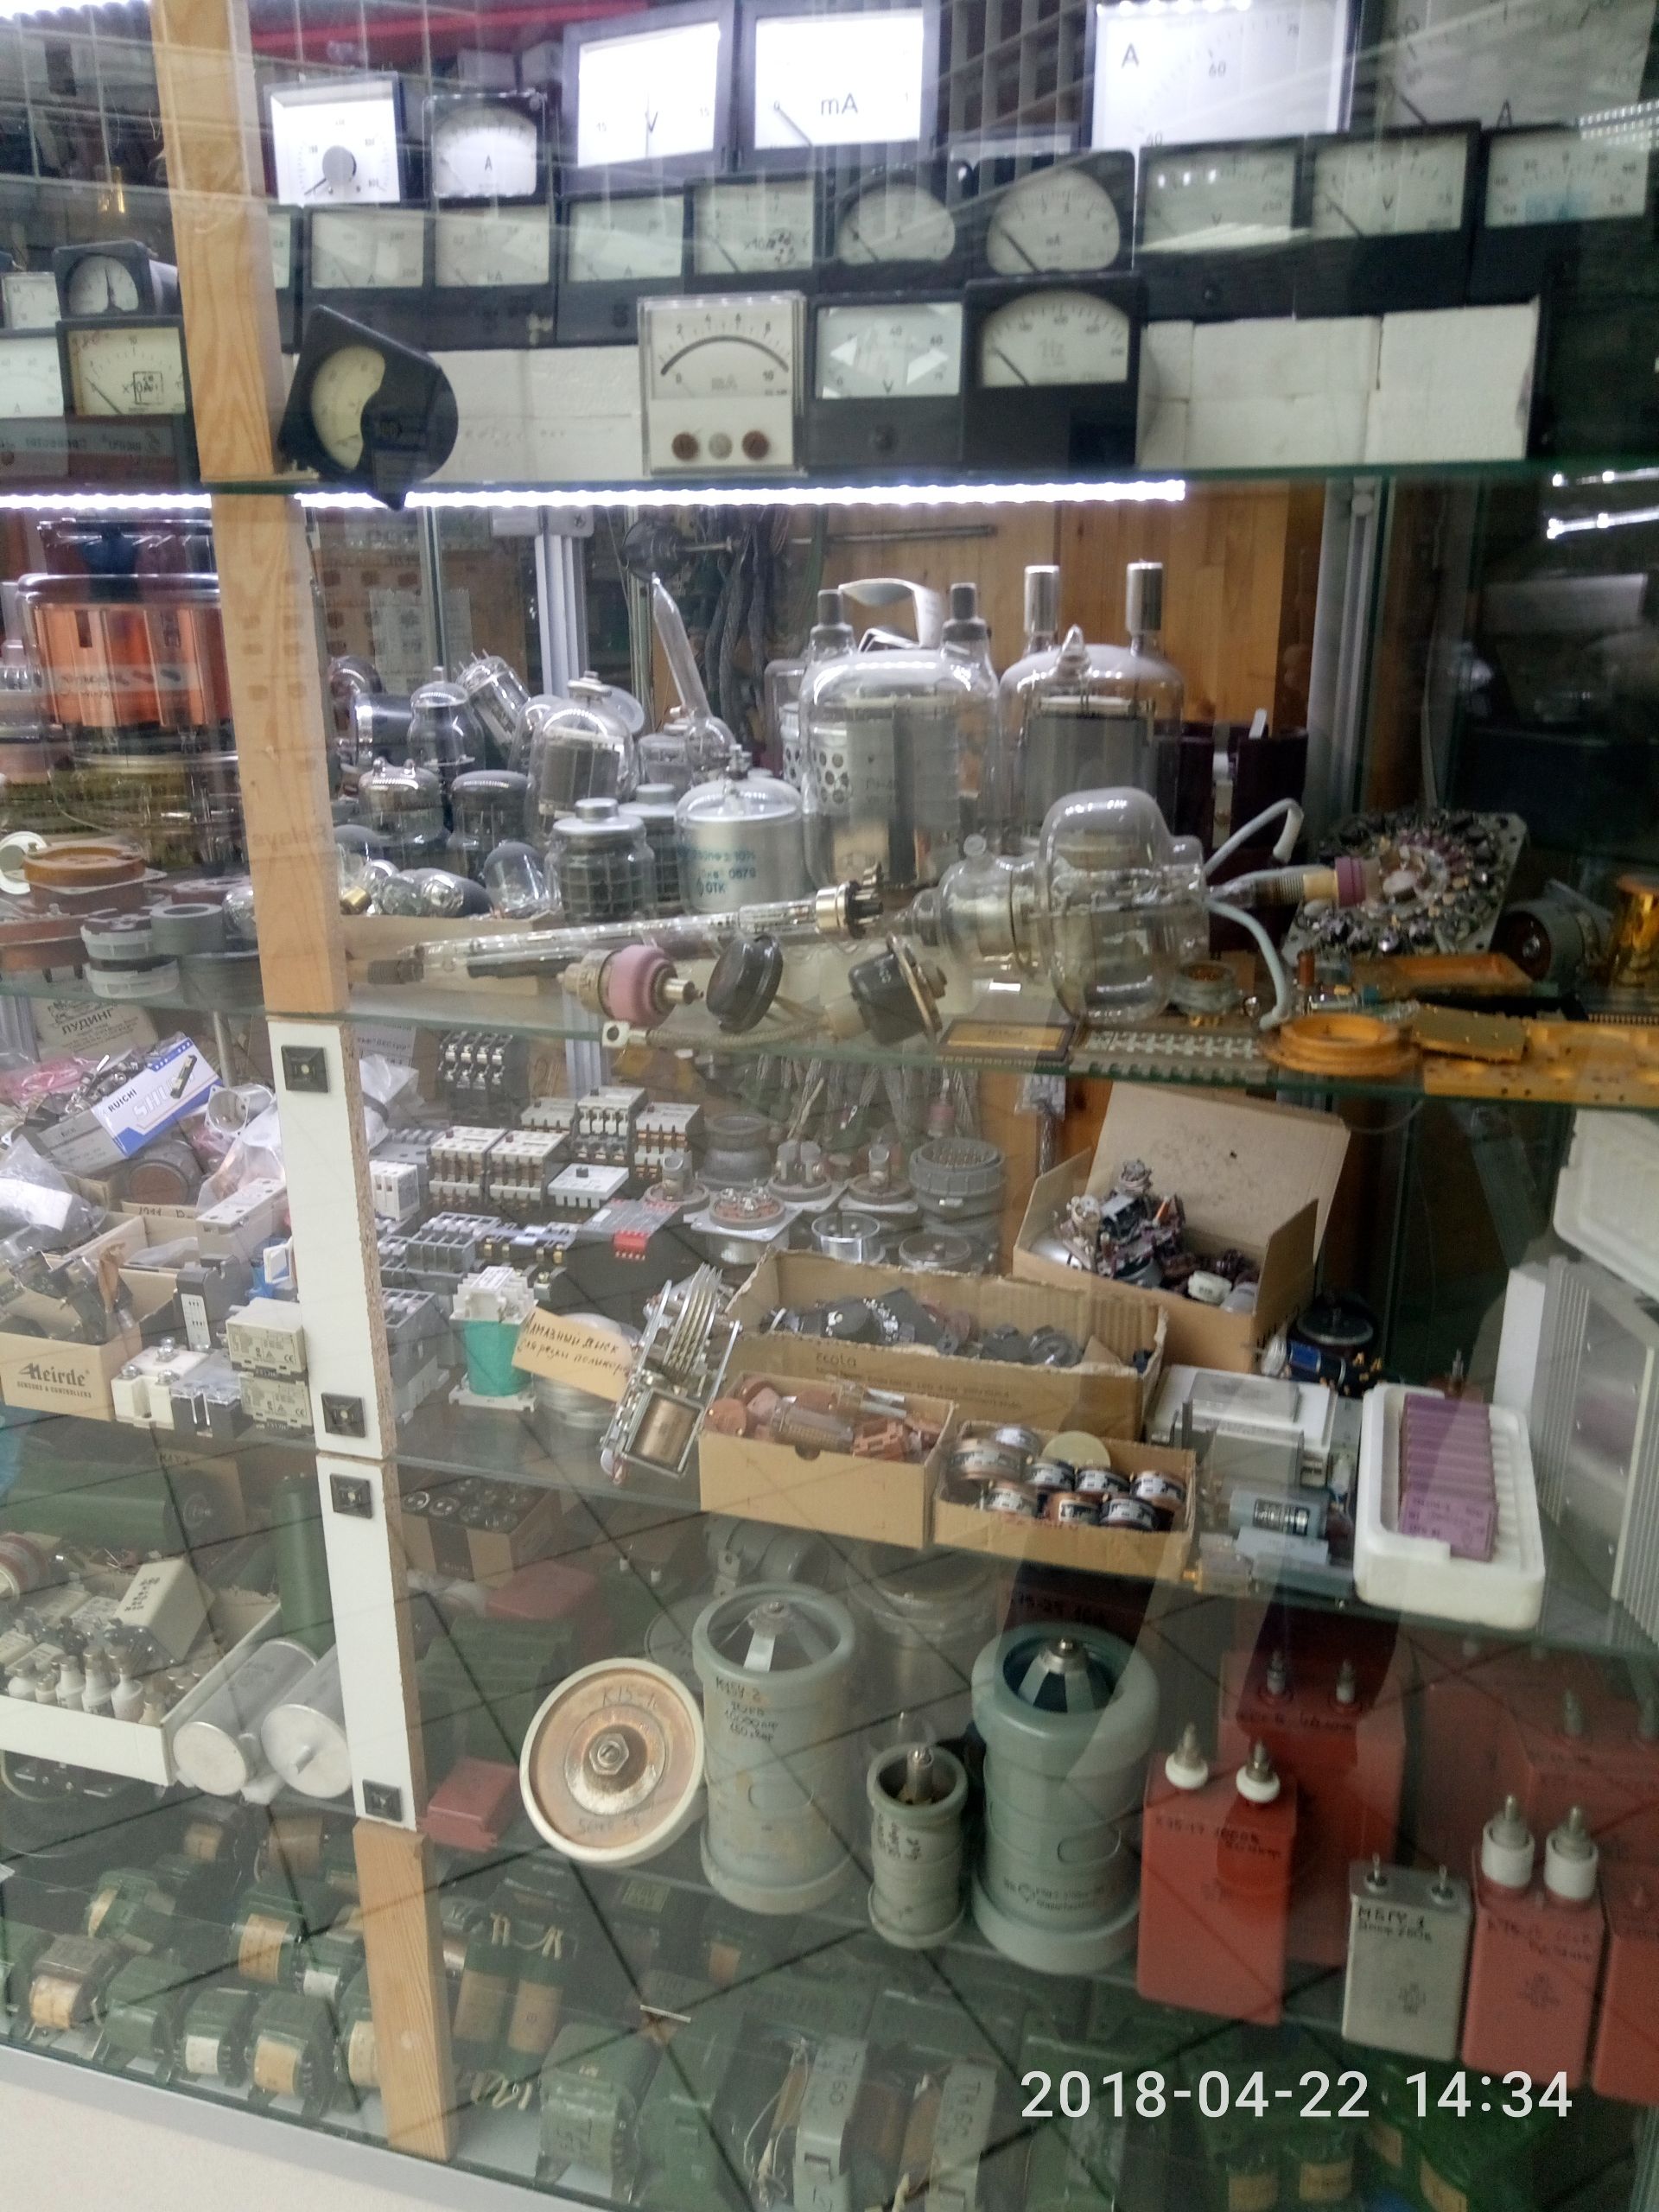
unfortunately over the last few years the place has been gradually transitioning from actual replacements parts for virtually whatever electronic part you have to mostly reselling cheap phone cases from china and regular retail shops, but there are definitely still a ton of shops that sell the kind of stuff shown in the pics
as for the keyboard, i really enjoyed assembling and soldering it all together (aside from all the trips I had to make in search of necessary components), and by itself i really like the way it turned out
there is definitely a transitional curve bc of how different the keyboard is to anything i used before that, but i almost immediately felt that the ergonomic benefits were worth it
split: very cool feature, a lot more comfortable than standard one-piece keyboards, not only for shoulder comfort and being able to angle individual halves better, but also bc you can put stuff between the halves and it’s convenient, plus, there’s virtually no learning curve to a split layout if you type the keys with the right fingers
otholinear layout: took a little bit of adjusting, but it’s more comfortable than a non-ortholinear layout, bc there’s very little left-to-right movement of fingers, which really puts strain on you
key columns adjusting for finger length (you can see that the middle column, which you’d type with your middle finger is further compared to the very-right column, which you’d type with your pinkey finger): helps in the sense that your fingers are more naturally positioned, none of them are overextended and none are bent too much, kind of like if you just lay your relaxed palm on a table
thumb clusters: easily one of the best changes, on a normal keyboard thumbs do almost nothing, but this layout takes advantage of their underutilizedness and strength, giving them useful functions
overall, i really like it, such niche kbs often turn out to be really expensive bc of low numbers sold, but given its quality i honestly think it wouldn’t have problems for decades to come, and the cables are definitely a hassle and I’m planning on getting the bluetooth controllers with batteries, which you can easily interchange with the current wired ones
Ahhhh! I wants to touch. That looks noooooice! Can you do some more pics from Lower angles? Can you link to the source or design of the boards.
omg that’s sexy
🙏🙏


