I want to know more about the out of focus back. Specifically what seem to be some pretty beefy speakers.
- 103 Posts
- 977 Comments
Thanks for the recommendations, I will check everything out!
Viking metal eh? I recently found Brothers of Metal and they’re banging. What else do you recommend?

 3·3 days ago
It looks like the answer is yes - you can grow a normal plant from each leaf!
https://leafandclay.co/blogs/blog/4-basic-ways-of-propagating-succulents

 7·3 days ago
Not a succulent expert by any means, but the fact that it’s growing some air roots and the dropped leaves also are trying to root also seems to point to not enough water.
We have a big jade that will air root when it’s too dry. Before it gets to that point it’s leaves will look noticeably less plump.
Succulents do require watering, but it’s very important to not overdo it. Our Jade is probably only watered ever two months or so when it’s outside (on an east facing porch in zone 6) during the summer and even less frequently in the winter. I know it well enough to be able to eyeball the plant at this point.
 3·3 days ago
If you intend on keeping it, why care about lineage of the brand? If it’s well made, of decent material, and fits the vast majority of the populus will neven consider/care what brand it is.

 7·4 days ago
For better or worse, there are multiple ways of measuring “American Made”. An alternate measure, which probably matters more in this conversation, is “how many people that worked on <product> are American residents”. Here’s a study that tries to rank each model by how much it contributes to the US economy
The vast majority of the development (engineering, planning, purchasing/supply chain, quality, after sales, etc) effort for Honda and VW is overseas, along with most other non-domestic brands. This extends beyond their own employees to their tier 1s. Many OEMs use suppliers that are located geographically close to their development centers.
None of this excuses the domestic OEMs for their abandonment of cars, their endless march to higher and higher average transaction price, or their quality records.
If it’s heat it could also be a cooling thing. If you search the web on your search engine of choice for “<printer name> driver overheat” you’ll see what solutions the community has already come up with.
For everyone following along at home: this website is worth a click if you’ve never seen it before!
Rinsing rice does wonders. Without a rice cooker you’ll need to strain it, but it’s still worth it.
- Measure rice by volume. Let’s say 2 cups worth
- Put into fine colendar and rinse until the water comes out clear. Mixing with your hand will speed this up. You can also do this in the pot you’re going to cook in and dump water out
- Put strained rice in your pot
- Add cold water. The ratio of water to rice matters a lot and varies by species of rice. The ratio will be printed on whatever container your rice came in. For Jasmin rice it’s 2 water to 1 rice, so for our two cups of rice you’ll need 4 cups of water
- Cover, turn on medium-high heat, being to boil. Don’t go far because it will boil over when it does boil
- Turn the heat down to low, crack the lid, and set a timer. The amount of time needed will vary based on rice. For Jasmin, 15 minutes is a good check-in time
- Pop the lid. See water bubbling up? If yes, replace lid and come back in a few minutes. If not, use a wooden spoon to get a peek at the bottom of the pot. See water? If yes, replace lid and come back fairly soon to check again. If not, your rice is done. Turn the heat off, fluff, enjoy.
We made rice for years using this method and it is a very reliable cooking method. Rice doesn’t really leave you a lot of wiggle room though, which is where a rice cooker comes in handy. As an added bonus, some rice cookers come with water lines in them. I measure my dry rice into the cooker, rinse using the cooker, dump most of the water out, and fill to the appropriate level.
Different species of rice have very different textures and somewhat (subtle) different flavorss.
Some rice, like basmati, can be cooked using the pasta method (intentionally use way too much water and strain the excess off after the rice is cooked). I guess all rice could be cooked that way, but you would be giving up some starch.
I totally agree. It seems like the strong suite for micro four thirds. If you’re willing to play the equivalence game a FF body with a slower prime (say f/2.0-f/2.8) is generally as compact as M43 body with a fast prime (say the Oly f/1.2s). Likewise, a number of the long Oly lenses, like the 100-400, are actually FF lenses with a M43 mount. Yeah, you get the 2.0 crop factor, but if you’re willing to shell out for a higher resolution FF body you can just crop.
That said, on pure size a rangefinder M43 with a somewhat slower prime can be truly compact. It seems like that’s where the M43 market would be, especially with the advent of high res FF bodies that crop well like Sony’s R line and A1, Nikon’s Z8/Z9, and Canon’s R5. Heck even Fuji’s X-H2 and XT-5. But since neither Panasonic or OM Systems are making these bodies anymore they must not have been very popular :(
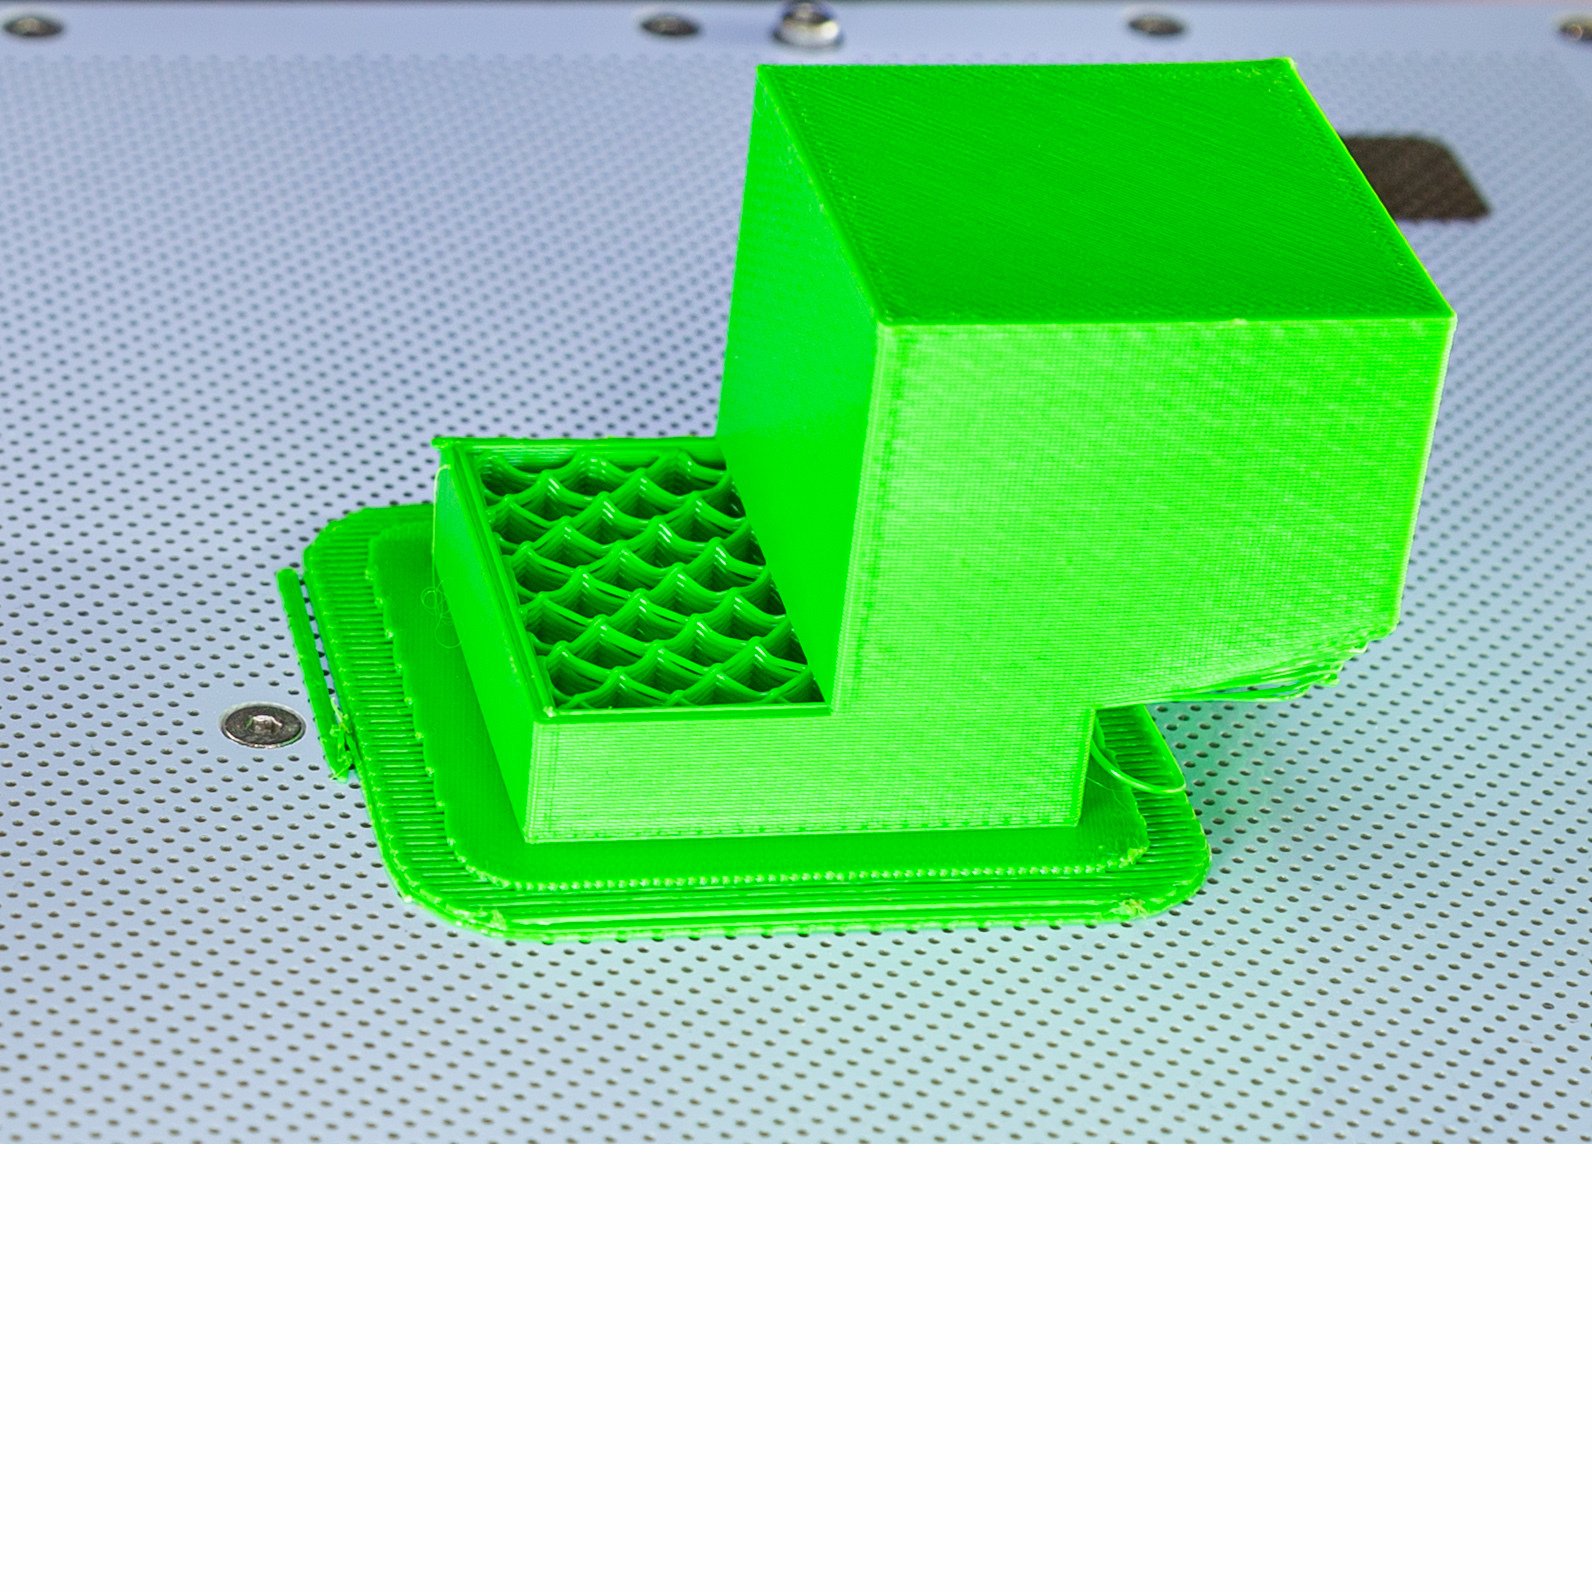
If the print didn’t come off the bed, I don’t think adjusting z-offset will help. As prints get taller, if you’re running into issues with warping the corners will start to curl up.
Your printer definitely missed some x or y steps. Whether that was due to your drivers getting too hot and just that, or the extruder running into the print. Have you ever seen your printer do this:
Does the stacking software handle alignment as the earth rotates? If so, that’s pretty cool. I’m tempted to take a stab at this if that’s the case.
How did you remove the pineapple last year? Cut the whole stalk off at the plant , right below the pineapple, something else?
It looks like you missed some x and/or y steps, which made the printer lose its orientation and make a lot of spaghetti.
Possible causes usually involve warping, the nozzle catching the wrapped up piece, and then your printer missing some steps.
Have you completed a large print before?
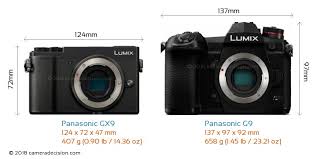
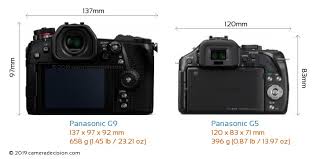
The GX9 is a rangefinder camera without much of a grip, so the body is pretty compact. The G9M2 on the other hand is a M43 sensor in a FF body. Here’s the GX9 vs G9:
The thing you’re asking about is an adapter. You could get f mount to: z mount (Nikon mirrorless), e mount (Sony), x mount (Fuji), etc. Not sure about Canon, they’ve been pretty protective of their new mount. It will add some overall length though.
If you’re looking for smaller gear, going to a mirror less system will result in a smaller body guaranteed. Modern glass can be smaller, but that’s not always the case. Especially for APS-C lenses. Most of the mirror less OEMs (Sony, Canon, Nikon) have been favoring FF glass. The glass will happily mount on a crop sensor body, but it will be physically larger than necessary.
If you want to save some size and mass, micro four thirds is worth a look. Something like the Olympus E-M5 or even E-M10, or Panasonic GX7/GX9 is pretty compact, and there are a bunch of compact micro four third zooms and primes out there.

 3·6 days ago
One other thought that occurred to me overnight: you might be asking about FIRE (financial independence, retire early). There are tons of strategies for going about that.
I would caution about moving toward “off grid” type scenarios. Your monthly costs will be less, but you will have significantly higher up front (if buying a new residence) and/or maintenance costs (if buying used and/or when you decide to sell). For example, our water and sewer bill is around $800/year. If anything outside the house fails, the utility company will fix it. My in-laws sold a home in NJ with well water and septic and had to replace their sceptic field before they were able to sell. That set them back somewhere between $30k and $40k. Depending on your goals it could be either an advantage or a disadvantage.

 5·7 days ago
Feedback: your actual questions start about 2/3 down your post. Lead with them next time so we know how to answer better :)
it’s really hard to apply my city-living experience to try to extrapolate what life might be like if I make a goal to buy a small home in Nowheretown, USA to retire in 20 years down the line
We have younger kids, live in a lower cost of area, and bought our house in 2011. Excluding frivolous categories, our top expenses are:
- Saving for our retirement. Between our 401ks and IRAs, this is our biggest expenditure by quite a bit
- Food. We don’t eat out a ton, but also don’t do a great job of eating low cost. Feeding four is also fun, we can’t wait until they’re teens. This category is not much ahead of #3 though
- Our mortgage (it’s a 30 year and taxes, insurance, principal, and actual mortgage are $1,250/mo)
- Saving for our kid’d potential college tuition
Once the kids are out and we’re retired categories #1 and #4 go away, category #2 will probably get cut in half, and our taxes and insurance are currently well under $4,500/year. Speaking of taxes, mine are capped at a maximum increase of 5% or inflation, whichever is lower. With the housing run-up this has worked out in our favor.
Home expenses are a thing. It’s hard to say how much to budget for that though. Some of it depends on you (eg do you really need to renovate that bathroom in full), your taste, and your budget. I would expect a decent outlay every 5 years or so - roof, brick/siding/exterior work, furnace/ac, driveway etc. The more you’re willing and able to do yourself the better off you’ll be.
You don’t have to be in the boonies to live in a low cost of living area.





Some succulents grow in such… seemingly unsustainable ways for the mother plant. I guess ultimately these are all some kind of propagation strategy for the plant though.
Alloe will overground their pots with tons of babies and fall over when they get too big.
Our big jade will intentionally dry out the center of some of its smaller branches to make the ends of the branch fall off in hopes of rooting.
I guess this is why the plants have been successful. It does make for some level of struggle as a house plant though, lol.