

When you design several features you don’t need and still haven’t used…
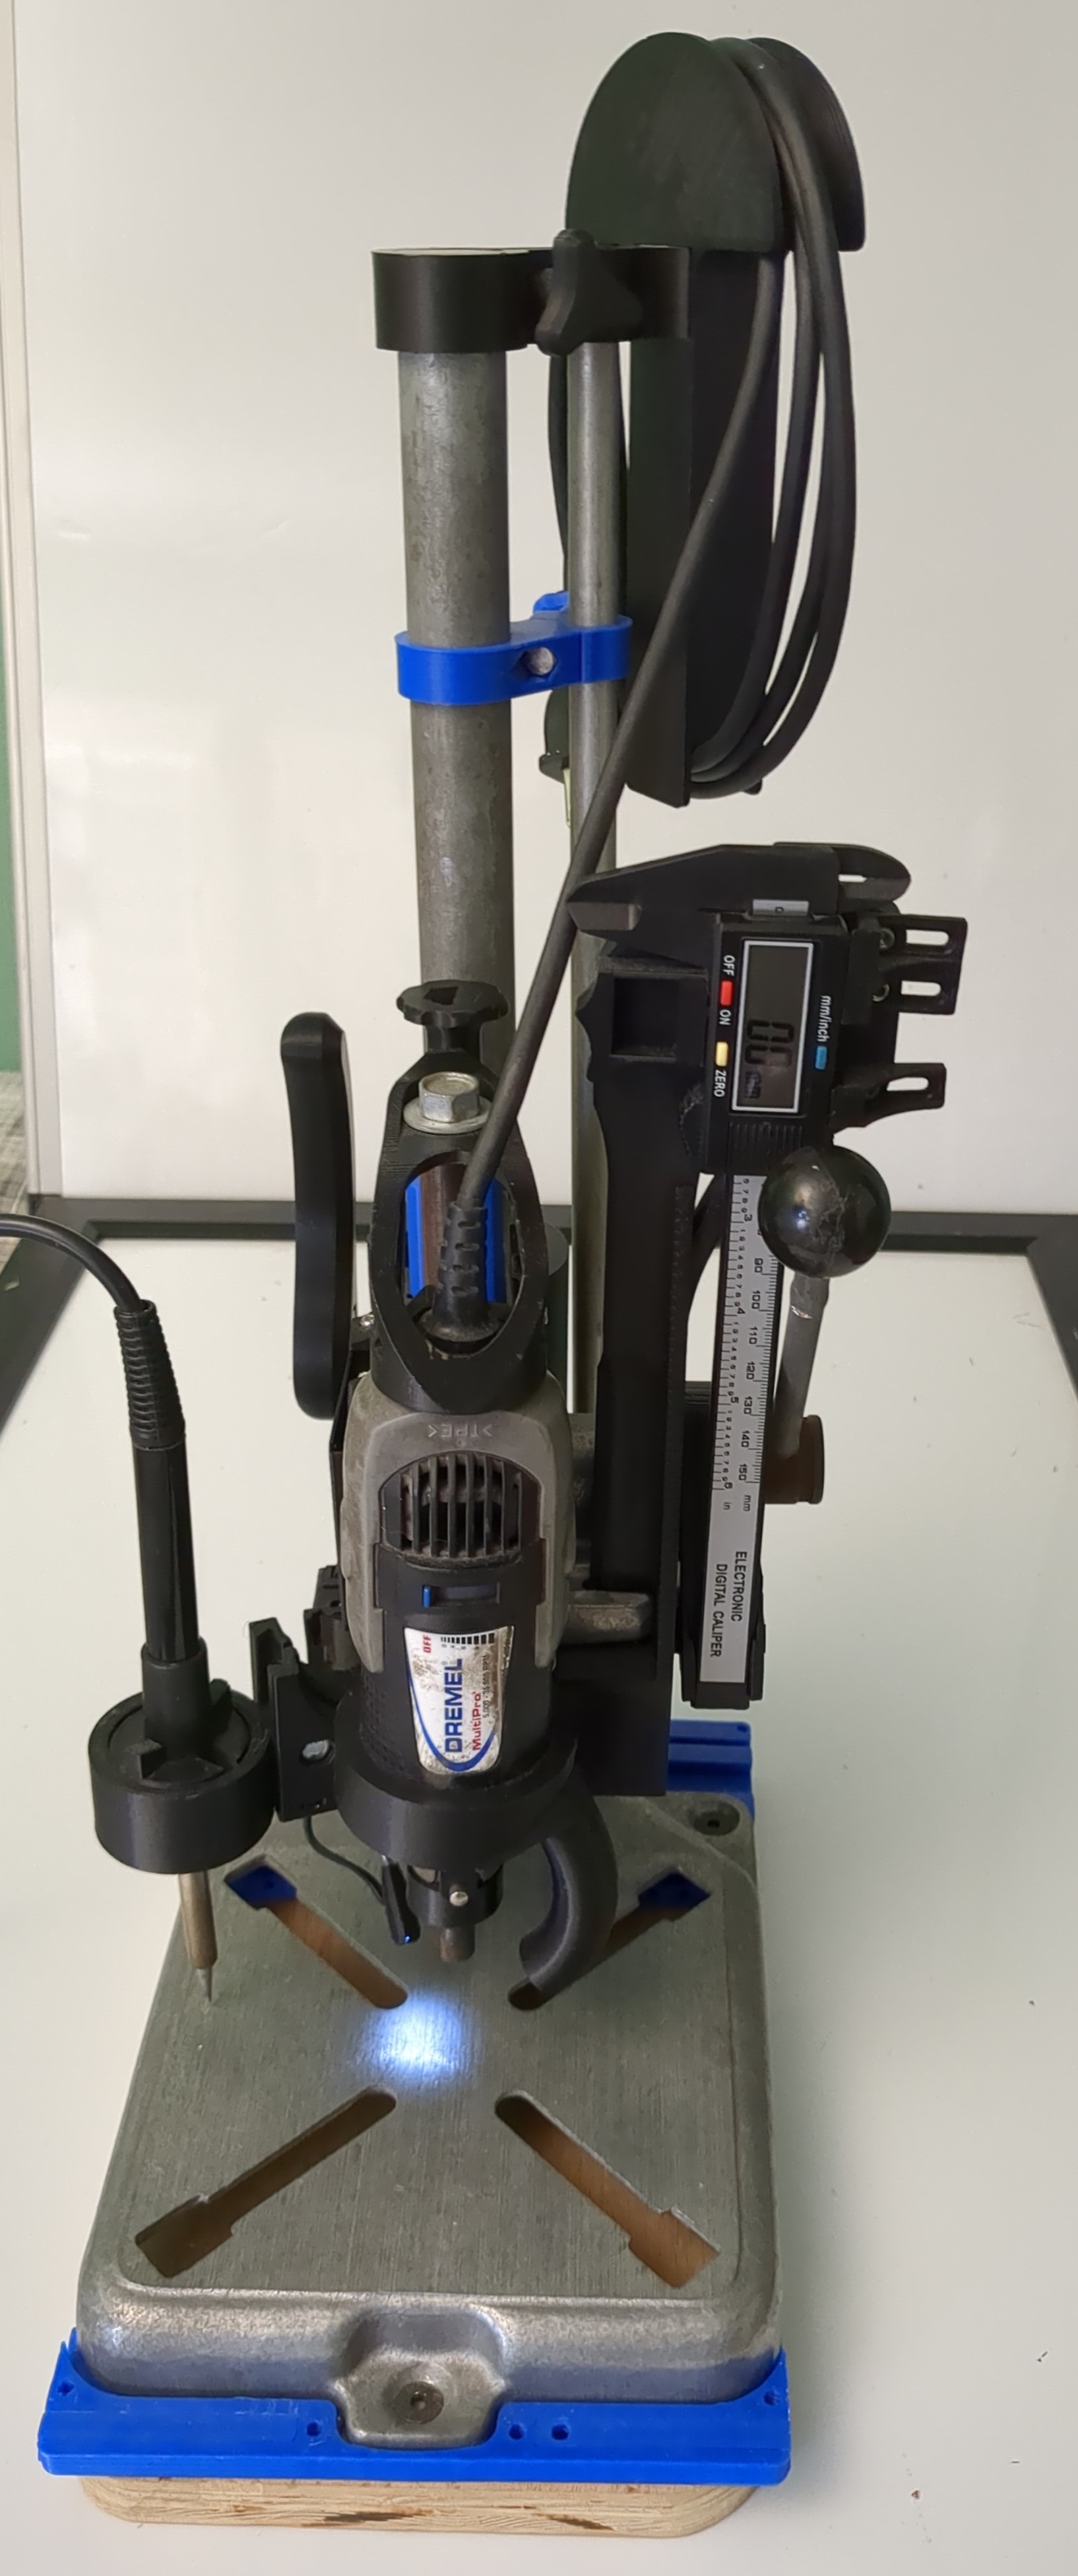
Some are very useful though. Every possible DoF has its own adjustable end stops; not super useful yet. The extra rear rod is the stop contact for left and right rotation of the head. The ability to replace the heatset insert iron holder and modularity of the entire design; is not super useful. A ton of mods to tune out and preload all of the backlash is super useful. I can drill 0.4mm holes without breaking bits… at least not due to the press mechanism backlash. There is a single LED light with a lipo battery, charge controller, and CMOS 555 that acts as a single point source light guide. If you are not aware, a single point source light will cast a shadow from the drill bit showing its exact location reliably; super useful. The dial calipers are attached as a digital readout. It is 0.1mm repeatable, maybe a little better but not much. I mostly intended to use it for heatset inserts but still have not done so. The caliper mount is part of the press alignment mechanism too. The dremel is secured in a threaded lower mount and with a ring clamp at the back of the body. There is a shroud around the dremel that redirects the motor exhaust output to blow away dust while drilling. There are also several mount points integrated inside and outside of the base of the unit and intended for additional work holding jigs (not pictured, used, or well developed).
These are all custom designs fitted to the specific parts all the way down to things like casting defects unique to this unit. This is not the kind of project that should be shared or posted publicly as a printable project. You would never be able to replicate this based on the meshed files even if you had the same models of parts. Sharing this is only intended for design inspiration.
You must log in or register to comment.
All its missing is a DRO for plunge, and a red dot of course
Genuinely cool as fuck and truly inspiring
this is great! I need to do a heap of heatset inserts and was going to buy a cheap “drill press” which holds a hand drill, and print an adapter to hold a soldering iron.
Honestly you don’t really need it. Only use the EZ-Loc type inserts. You really need an iron that uses hakko 900 series tips so you can get the ones made for hetset inserts. These have a stepped collar to drive the insert in straight. The EZ-Loc inserts have a tapered collar on the side that goes in first. Measure this and make the hole the same size or like 0.2mm larger. If you test insert one in a print and any material is pushed out and deforms the top surface resize like 0.1mm larger until you get it perfect. Make the hole that is the same size as the insert collar 0.5mm deeper than the total insert’s depth to make room for squeeze out. Then make a hole large enough your bolt thread will not contact. Like for my typical EZ-Loc M3 inserts the largest serrated diameter is 4.6mm. The insert collar is 3.9mm. The total depth is 5.5mm. So I make a hole in my part that is 4.1mm × 6mm deep just for the insert. Then I make the screw thread hole 3.6mm to be sure the thread will clear and I make this hole at least 1mm longer than the screw I will be using. Finally, be sure there is a chamfer between the 4.1mm to 3.6mm bore transition so that this lip doesn’t get pushed into the insert or thread path. This is critical too. If the any plastic gets in the insert or thread path you run a serious chance of the thread binding and spinning the insert, likely ruining the part. The trick is to dial in the size so that the insert wants to chase the hole.
If you are having serious trouble driving the insert straight, even a press is unlikely to help. Soldering irons are usually not rigid enough to really work like a press. It is much more reliable to get some threaded rod or a much longer screw, preferably stainless because it sucks at conducting heat. Thread it a couple turns into the part from the other side (assuming it is not a blind bore). Then use a higher iron temperature and drive in the insert quickly. You should be able to use the rod/screw to keep everything aligned.
Any time you use inserts for structural items the insert should be pulled from the side it was placed, into the part by the fastener. By default this means the bore should not be blind. This is when alignment matters most.
Honestly the only time I use the press is when I need an insert in a tight area deep in an enclosed part where my hands are not steady enough to avoid touching the iron to a wall.
McMaster Carr sells a ton of the 900 series tips including special ones for removing inserts. If you get the cheap Chinese conical fine regular soldering tips without a nickel plating (the raw copper type), you can use any small steel nut from M1.2-M4 and try to thread it into the copper tip. This will make 1-2 threads in the soft copper. This will be just enough to thread into heatset inserts and remove them. This is the dirt cheap way to fix mistakes, recover hardware, and straighten a bad insert in some instances.
yikes! thanks for the ultra informative post! this guy inserts ^^^^
